2022. 8. 30. 15:47ㆍ코딩 2막 <C#개념편>/코딩 2막 <C#응용편>
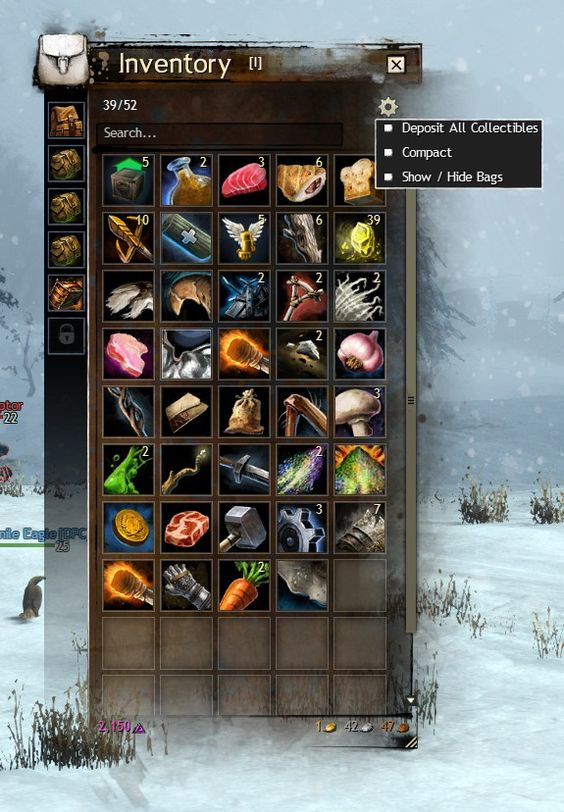
인벤토리(Inventory)
오늘은 스크립터블 오브젝트를 통해 아이템의 기능을 구현하고
실제로 게임에서 아이템을 추가하고 삭제할 수 있도록 인벤토리를 만들어보겠습니다

스크립트
1. Item.cs
| 아이템은 사용하는 행동이 중요하기보다 아이템(객체)이라는게 더 중요하다는 점에서 인터페이스보다 추상클래스가 적절하다 이후에 있을 데이터들이 인게임에 들어가거나 플레이어에게 장착하거나 인벤토리로 들어가는 각각의 상황들에 맞게 가능하려면 아이템을 데이터로 만들어야 한다(스크립터블 오브젝트) 추상클래스는 인터페이스와 마찬가지로 사용되는 추상함수가 상속받는 클래스에서 반드시 재정의 되어야 한다. |
|
1
2
3
4
5
6
7
8
9
10
11
12
13
14
15
16
17
18
19
20
21
|
using System.Collections;
using System.Collections.Generic;
using UnityEngine;
public abstract class Item : ScriptableObject
{
public new string name;
public Sprite icon = null; // 2D
public GameObject prefab = null; // 게임씬3D
public abstract void Use();
public void Drop()
{
Debug.Log(name + "을 버린다.");
Transform position = GameManager.Instance.player.dropPoint;
Instantiate(prefab, position.position, Quaternion.identity);
InventoryManager.Instance.RemoveItem(this);
}
}
|
cs |
2. GameManager.cs
싱글톤을 쓰기위해 게임메니저의 플레이어컨트롤의 플레이어변수를 추가하겠습니다
플레이어가 아이템과 상호작용 하기 위함
|
1
2
3
4
5
6
7
8
9
10
|
using System.Collections;
using System.Collections.Generic;
using UnityEngine;
public class GameManager : Singleton<GameManager>
{
//플레이어컨트롤러의 플레이어변수를
public PlayerController player;
}
|
cs |
3. Inventory Manager.cs
인벤토리를 관리하는 매니저를 만들었습니다
인벤토리가 갖는 역할에 따라 자료구조를 쓰는 방식이 달라지는데
기본적으로 변수들(아이템)의 갯수가 정해지지 않았고 자유롭게 삭제/추가를 위한 인벤토리라면 '리스트'를 쓰겠지만,
만약 갯수가 정해진 상태에서 빠르게 아이템을 확인하는 용도의 목적이 강한 인벤토리라면
배열을 통해 인벤토리를 구현하는게 낫다
따라서 리스트로 구현하였다
|
1
2
3
4
5
6
7
8
9
10
11
12
13
14
15
16
17
18
19
20
21
22
23
24
25
26
27
28
29
30
31
32
33
34
35
36
37
38
39
40
|
using System.Collections;
using System.Collections.Generic;
using UnityEngine;
public class InventoryManager : Singleton<InventoryManager>
{
[SerializeField]
private InventoryUI inventoryUI;
// 게임오브젝트 자체가 들어가는것이 아닌 데이터(스크립터블오브젝트)가 들어가는 것
public List<Item> items = new List<Item>();
private void Update()
{
if (Input.GetKeyDown(KeyCode.I))
{
if (inventoryUI.gameObject.activeSelf)
{
Cursor.lockState = CursorLockMode.Locked;
inventoryUI.gameObject.SetActive(false);
}
else
{
Cursor.lockState = CursorLockMode.None;
inventoryUI.gameObject.SetActive(true);
}
}
}
public void AddItem(Item item)
{
items.Add(item);
inventoryUI.UpdateUI();
}
public void RemoveItem(Item item)
{
items.Remove(item);
inventoryUI.UpdateUI();
}
}
|
cs |
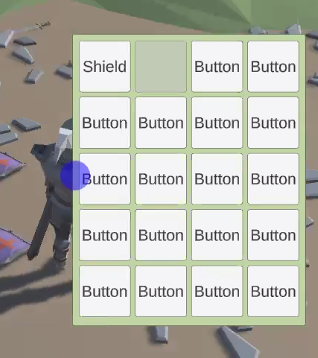
4. InventoryUnits.cs
인벤토리 UI에서 각각의 인벤토리 유닛(아이템이 들어가는 칸)의 기능을 구현하기 위한 스크립트를 만들었습니다
|
1
2
3
4
5
6
7
8
9
10
11
12
13
14
15
16
17
18
19
20
21
22
23
24
25
26
27
28
29
30
31
32
33
34
|
using System.Collections;
using System.Collections.Generic;
using UnityEngine;
using UnityEngine.UI;
using TMPro;
public class InventoryUnit : MonoBehaviour
{
private Button button;
[SerializeField]
private TextMeshProUGUI text;
private Item item;
public void AddItem(Item item)
{
this.item = item;
button.interactable = true; // 아이템 클릭 시 사용
text.text = item.name;
}
public void RemoveItem()
{
this.item = null;
button.interactable = false;
text.text = "";
}
public void Use()
{
item.Use();
}
public void Drop()
{
item.Drop();
}
}
|
cs |
5. InventoryUI.cs
인벤토리 UI에는 자신이 갖고있는 아이템 리스트에 아이템이 습득되면 추가되고 버리면 삭제되도록 인벤토리창을 만들었다
|
1
2
3
4
5
6
7
8
9
10
11
12
13
14
15
16
17
18
19
20
21
22
23
24
25
26
27
|
using System.Collections;
using System.Collections.Generic;
using UnityEngine;
public class InventoryUI : MonoBehaviour
{
private InventoryUnit[] inventoryUnits;
private void Awake()
{
inventoryUnits = GetComponentsInChildren<InventoryUnit>();
}
public void UpdateUI()
{
for (int i = 0; i < inventoryUnits.Length; i++)
{
if (i < InventoryManager.Instance.items.Count)
{
inventoryUnits[i].AddItem(InventoryManager.Instance.items[i]);
}
else
{
inventoryUnits[i].RemoveItem();
}
}
}
}
|
cs |
6. ItemController.cs
3D 게임오브젝트 자체가 인벤토리에 들어갈수없고 아이템의 데이터만 저장됨
|
1
2
3
4
5
6
7
8
9
10
11
12
13
14
15
16
17
18
19
20
21
22
23
24
25
26
27
|
using System.Collections;
using System.Collections.Generic;
using UnityEngine;
public class ItemController : MonoBehaviour, IInteractable
{
[SerializeField]
private Item item; // 아이템 정보
public void Interaction()
{
Debug.Log(item.name + "을 줍는다.");
InventoryManager.Instance.AddItem(item);
Destroy(gameObject);
}
public void OnFocused()
{
}
public void OnUnFocused()
{
}
}
|
cs |
7. Equipment : Item
아이템의 종류 중 장비(equipment) 클래스를 구현
장비에는 sword와 shield를 스크립터블 오브젝트로 만들었음

|
1
2
3
4
5
6
7
8
9
10
11
12
13
|
using System.Collections;
using System.Collections.Generic;
using UnityEngine;
[CreateAssetMenu(menuName = "Item/Equipment")]
public class Equipment : Item
{
public override void Use()
{
Debug.Log(name + "을 사용한다.");
}
}
|
cs |
+) 포션 아이템도 추가 할 수 있음
[코드리뷰]
인벤토리를 만든 결과물
공감해주셔서 감사합니다
'코딩 2막 <C#개념편> > 코딩 2막 <C#응용편>' 카테고리의 다른 글
| [C#, 유니티] 코루틴 IEnumerable, IEnumerator (0) | 2022.11.07 |
|---|---|
| [C#, 유니티] Unity3D_RPG Scriptable 응용 1 (선택지, 퀘스트 생성) (1) | 2022.08.29 |
| [C#, 유니티] Unity 3D_FPS 게임 구현 (2) | 2022.08.16 |
| [C#, 유니티] Unity 3D_이벤트 구현 (0) | 2022.08.12 |
| [C#, 유니티] Unity3D_인터페이스 구현 (물에 반응하는 인터페이스) (1) | 2022.08.12 |